Sidebar
User's Manual
This is an old revision of the document!
Table of Contents
Universal Gamepack
Loading the Gamepack
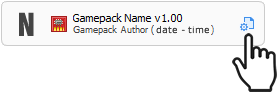
To load a Gamepack into the Titan Two, simple drag-and-drop the Gamepack icon box from the Online Resources to any Memory Slot in the Gtuner's Device Memory Slots pane.

| If the Memory Slot is not empty, its content will be overwritten. |
After the drag-and-drop process, the Memory Slot should show the Gamepack name, version, author and the date/time it was loaded in the Memory Slot.
Using the Gamepack
After loading the Gamepack into the Titan Two, press the right button on the device until the display shows the same number of the Memory Slot the Gamepack was dropped.
Runtime Operation: Press [OPTIONS | MENU] + [R1 | RB] to quickly enable/disable the Gamepack without unload the Memory Slot. The controller will vibrate once to indicate the Gamepack is disabled, and twice to indicate the Gamepack is enabled. |
Configuring the Gamepack
After drag-and-drop the Gamepack to any Memory Slot, click on the configuration icon to open the Interactive Configuration Interface.
The Interactive Configuration Interface contains all MODs available on the Gamepack. By default all available MODs are disabled. The following instructions explain how to enable and configure each available MOD.
FIRE MODE
Select an option for when rapidfire and or anti-recoil should be activated:
- Activated on fire trigger (HIP)
The selected mods are activated when the Fire button is pressed. - Activated on fire trigger and scope (HIP+ADS)
The selected mods are activated when both the Fire and the scope(ADS) buttons are pressed.
RAPIDFIRE
Runtime Operation: Press [OPTIONS | MENU] + [L1 | LB] to toggle on/off the selected Fire Mode. The controller will vibrate once to indicate the Fire Mode is disabled, and twice to indicate the Fire Mode is enabled. |
- Disabled
All rapidfire modes are completely disabled. - Simple Rapidfire
This Rapidfire Mode uses the hold and release times, the default values are recommended. The fire button is automatically pressed and released very quickly. Indicated for semi-automatic weapons, especially handguns. Rapidfire will negatively affect automatic weapons. Read the “Simple Rapidfire Configuration” sub-section for more details. - Advanced Rapidfire
This Rapidfire Mode allows customization of the first-to-second shot delay and the number of shots for burst fire. Force a delay between the first and subsequent shots and auto stop after a determined number of shots. Read the “Advanced Rapidfire Configuration” sub-section for more details. - Auto Simple Rapidfire
This Rapidfire Mode is the same as Simple Rapidfire but requires vibration to be turned on in-game. When you fire a semi-automatic weapon rapidfire will automatically be enabled, When you release the trigger or switch to an automatic weapon rapidfire will automatically be disabled with no user action required. You do not need to activate the rapidfire toggle.
Simple Rapidfire Configuration:
- Hold time (ms)
This parameter sets for how long, in milliseconds, the fire button should be kept pressed in the rapidfire cycle. - Release time (ms)
This parameter defines the time to wait, in milliseconds, before the fire button should be pressed again, repeating the rapidfire cycle.
Advanced Rapidfire Configuration:
- First to second shot delay (ms)
The recoil of some weapons can be much stronger on the first fired shot. This parameter adds an extra delay between the first and second fired shots to help better control the recoil, which can be very useful when used in conjunction with the Anti-Recoil MOD. - Number of shots (burst fire)
Configure how many rapidfire cycles should run until the fire button is pressed again on the controller. This parameter can convert fully-automatic weapons in semi-automatic single or burst, as well as semi-automatic-single weapons in semi-automatic-burst.
ANTI RECOIL
The anti-recoil automatically pulls the aiming stick to oppose the weapon recoil while firing. The required pull force varies accordingly the weapon in use and can be configured using the “Anti-recoil Vertical” parameter.
Anti-recoil vertical pull force compensation
Configure the force of the anti-recoil pull-down. The value can go from 0.00 to 100.00, where 0.00 has no effect and 100.00 is equivalent to pulling the aiming stick all the way down. Normally values between 20.00 and 45.00, depending on the weapon in use, are enough to counter the recoil.
To adjust the anti recoil in game hold [OPTIONS | MENU] + [UP | DOWN]
Rumble Activation:
Automatically start/stop the anti recoil function.
- Disabled
Rumble activation is disabled. Anti-recoil will activate on Fire Mode trigger press. - Start on rumble
Anti-recoil will be activated when Fire Mode is pressed and rumble is detected. The anti recoil will stop when the trigger is released. - Stop on rumble
Anti-recoil will be activated when Fire Mode is pressed. The anti recoil will stop when no rumble is detected. - Start/stop on rumble
Anti-recoil will be activated when Fire Mode is pressed and rumble is detected. When no rumble is detected the anti-recoil will stop.
Deadzone Compensation:
All anti-recoils will apply both the vertical value + the deadzone value.
PROFILES:
In this section of the interactive configuration you can find profiles 0-9 to set custom anti-recoil values for different weapons. You can use the Numpad 0-9, F1-F10 keys or a controller to cycle through the anti-recoil profiles.
To cycle between anti-recoil profile slots using a controller hold [OPTIONS | MENU] + [LEFT | RIGHT]
For an indication of what slot is being used refer to the colors in the interactive configuration. Ex Profile 0 uses the color red for the text and once loaded the Titan Two's LED will turn red.
STANCE:
For games that apply different recoil for standing, crouch & prone. The LED will change with your stance based on the loaded profile color. If you do not wish to have the LEDs changed be sure to check the Disable LED box.
SCOPE MODE
Scope Options:
- Disabled
All scope options are disabled. - Auto ADS
When the fire trigger is pressed the scope (ADS) will automatically be pressed for you. - Toggle ADS
The scope (ADS) trigger once tapped will stay scoped until you tap the trigger again to release it.
Hold Breath Button:
Automatically perform the “hold breath” action when the selected hold breath button is pressed.
* Disabled
Auto hold breath will not be activated.
Quick-Scope:
Quick-Scope is usually used with one-shot kill sniper rifles. This MOD automatically executes the action of ADS (“Aiming Down the Sights”), hold-breath and finally fire at the configured time. This technique is particularly effective on consoles due to the aim assist that tends to pull the crosshairs towards an enemy when starting to ADS.
| Activation: Tap the Scope(ADS) button to execute the Quick-Scope. Press and hold the Scope(ADS) maintains the original function of the button. |
Quick-Scope Timing(ms)
Sets the time, in milliseconds, to wait before firing. The Quick-Scope timing must be set accordingly the weapon in use to perfect the accuracy.
ACTIONS
Choose an extra action to be automatically executed when the selected condition is met.
- Crouch Shot on fire trigger (HIP)
Automatically go to crouch position when the Fire button is pressed. - Crouch Shot and scope(ADS) on fire trigger
Automatically go to crouch position when both the Fire button and the Scope(ADS) button are pressed. - Crouch Shot (Spam) on fire trigger (HIP)
Automatically go to crouch-stand position continuously when the Fire button is pressed. - Crouch Shot (Spam) and scope(ADS) on fire trigger
Automatically go to crouch-stand position continuously when both the Fire button and the Scope(ADS) button are pressed. - Drop Shot on fire trigger (HIP)
Automatically go to prone position when the Fire button is pressed. - Drop Shot and scope(ADS) on fire trigger
Automatically go to prone position when both the Fire button and the Scope(ADS) button are pressed. - Jump Shot on fire trigger (HIP)
Automatically jump one time when the Fire button is pressed. - Jump Shot on fire trigger and scope (ADS)
Automatically jump one time when both the Fire button and the Scope(ADS) button are pressed. - Strafe Shot on fire trigger (HIP)
Automatically move left-right when the Fire button is pressed. - Strafe Shot and scope (ADS) on fire trigger
Automatically move left-right when both the Fire button and the Scope(ADS) button are pressed.
AIM ASSIST:
Aim Assist Value:
Set your desired aim assist value. If the value is set below your in-game deadzone aim assist will have no effect. If set too high you will get excessive screen shake.
Auto Aim (Aim Abuse):
- Auto Aim (Aim Abuse) on Scope(ADS) trigger
Activate Auto Aim (Aim Abuse) when the Scope(ADS) button is pressed.
Auto Aim Hold Time
Configure the time in milliseconds, of which the Scope(ADS) button should be held when Auto Aim (Aim Abuse) is activated.
Auto Aim Release Time
Configure the time in milliseconds, of which the Scope(ADS) button should be released when Auto Aim (Aim Abuse) is activated.
AUTO SPOT
Auto Spot Time
The spot/tag button will be automatically pressed every x milliseconds.
Auto Spot Button
Select your in game spot/tag button.
* Disabled
Auto spot will not be activated.
GRENADE OVERCOOK
Grenade Overcook Time
Configure the time in milliseconds based on how long it takes for your grenade to explode. The grenade will then automatically be thrown for you.
Grenade Button
Select your in game grenade throw button.
* Disabled
Grenade overcook will not be activated.
TURBO MELEE
Turbo Melee executes the melee action repeatedly, Turbo Melee also automates -when possible- processes that take advantage of in-game glitches to decrease the time between attacks.
Melee Button
Select your in game melee button.
* Disabled
Turbo melee will not be activated.
HAIR TRIGGERS:
The hair-trigger drastically increases the sensitivity of the fire and ads trigger buttons. This has become more relevant as the game developers started to apply deadzone to the trigger buttons, requiring the player to pull the trigger at least halfway down for the action to be registered by the game.
RELOAD CANCEL:
For games that allow reload canceling. Automatically cancel the reload once the fire trigger is pressed. Set the reload time (in ms) to the highest reload time out of the weapons you use. Ex: My SMG reloads in 2 seconds so I would set 2000ms.
EASY SPRINT
Easy Sprint attaches the sprint action to the stick movement, avoiding the need to press the Sprint button repetitively.
- Activated on move stick 50% forward
Start sprinting as soon as the movement stick is pushed 50% forward. - Activated on move stick 90% forward
Start sprinting when the movement stick is pushed 90% forward. - Activated on double tap stick forward
Start sprinting by double-tapping the movement stick forward.
MICROPHONE:
Push/toggle to talk feature.
- Single button activation
When this option is selected only Button[1] needs to be pressed to activate the MIC. - Duel button activation
When this option is selected both Button[1] & Button[2] needs to be pressed to activate the MIC
MODE:
- Push to talk
When this option is selected you must hold the selected button(s) activate the MIC. - Push to toggle
When this option is selected tap the selected button(s) once to toggle the MIC on and tap again to disable.
BLOCK OUTPUT:
When this option is chosen the selected button(s) to activate the MIC will not be sent to the console/PC.